How to Generate a Mandate Number on the New GoG ePay Services Portal 2026
If you’re a Government of Ghana employee and need a GoG mandate number for a salary loan, payroll deduction, or other financial service, you can generate it through the new GoG ePay Services portal.
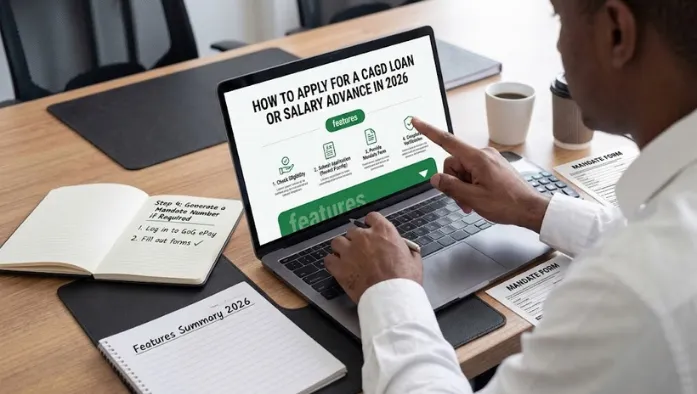
The process starts with logging into your registered account, opening the Mandate section, adding the necessary details, and submitting the request. The mandate number is then sent to your registered mobile number by SMS according to current portal guidelines.
What Is a Mandate Number?
A mandate number is a reference generated through the GoG ePay Services system for a payroll-related authorization. An institution can use it to verify your payroll information or process a financial arrangement connected to your salary.
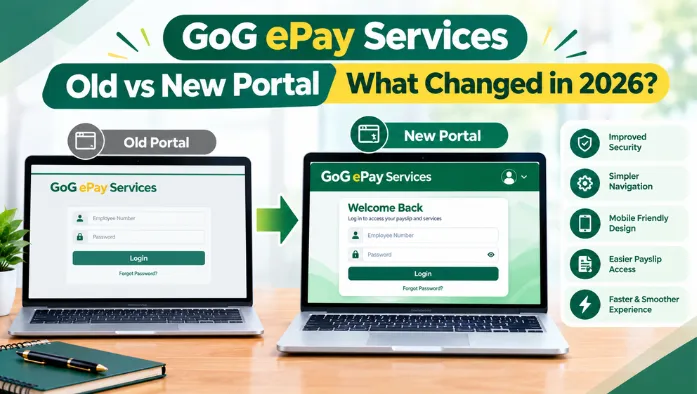
The mandate process is part of the CAGD payroll system used for financial transactions and payroll deductions. CAGD’s upgraded 2026 e-payslip system provides employees with online access to payroll services through the new portal.
What a Mandate Number Is Used For
A mandate number may be requested when a bank, lender, insurance provider, cooperative, or another institution needs authorization related to your payroll information.
For example, a bank may ask for an employee mandate number as part of a salary-backed loan application. Some financial institutions list the employee mandate number among their loan requirements.
Mandate Number vs Mandate Form
A mandate number is the reference generated through the payroll system, while a mandate form refers to the authorization documentation used in a payroll-related transaction.
The exact documents an institution asks you to submit can vary. If your bank or financial institution requests a mandate number, confirm whether it also requires a printed or completed mandate form.
When Do You Need a GoG Mandate Number?
You don’t need a mandate number for every service on the GoG ePay Services portal. It is mainly relevant when you’re authorizing a payroll-related financial transaction or allowing an institution to verify information connected to your government salary.
Salary Loans and Payroll Verification
A mandate number may be required when applying for a salary-backed loan. A lender can use the relevant payroll authorization to verify salary information and assess the application.
For example, GCB’s Controller Loan requirements include an Employee Mandate Number and PIN alongside other application documents.
Payroll Deductions and Other Financial Services
Mandates can also be connected to payroll deductions and other financial arrangements involving non-government institutions.
CAGD’s payroll system has historically supported third-party deductions and financial transactions, including loans and other facilities.
What You Need Before Generating a Mandate Number
Before starting the process, make sure your GoG ePay Services account is properly registered and that your payroll details are available. The 2026 registration process uses employee and Ghana Card information and requires a confirmed mobile number for OTP verification.
Active GoG ePay Services Account
You need a registered account on the new GoG ePay Services portal. The current portal is announced by CAGD. If you haven’t completed your registration, finish that process before trying to generate a mandate.
Employee Number and Password
Keep your Employee Number or Staff ID and your GoG ePay Services password ready. You’ll need to sign in before you can access the mandate section; otherwise, Reset Your Password to regain access.
Registered Mobile Number
Your mobile number is important because the new 2026 system requires phone verification through an OTP during registration, and current mandate instructions state that the mandate confirmation is sent by SMS to the registered phone number.
Correct Payroll and Ghana Card Details
Your employee and Ghana Card information should match the records associated with your payroll profile. CAGD’s 2026 announcement states that employees use their Employee Number and Ghana Card number during registration on the upgraded system.
How to Generate a Mandate Number on GoG ePay Services
Once your account is ready, the process can be completed from the dashboard.
Step 1: Log In to the GoG ePay Services Portal
Go to the GoG ePay Services portal and sign in with your registered details. Enter your Employee Number and password, then complete any verification requested by the portal.
Step 2: Open the Mandate Section
After logging in, look for the Mandate option on your dashboard. Select it to open the area where you can view existing mandates and create a new one.
Step 3: Select “Add New”
Inside the Mandate section, select Add New to start a new mandate request. It opens the form where you provide the details of the transaction or authorization.
Step 4: Enter the Mandate Details
Enter the information requested by the portal. Current instructions identify fields such as:
- Purpose
- Maximum Amount
- Institution
Choose each option carefully because these details identify what the mandate is for and which institution is connected to the request.
Step 5: Review and Submit the Request
Before submitting, check the purpose, amount, and institution. Make sure the information matches what your bank, lender, or other institution requested. Once everything is correct, submit the mandate request.
Step 6: Receive Your Mandate Number by SMS
After submission, the mandate number is sent to the mobile number registered with your account according to current portal guidance.
Keep the SMS until you’ve completed the transaction that required the mandate.
How to Fill Out the Mandate Details Correctly
The information you enter determines what the mandate is associated with. Take a moment to check everything before submitting rather than trying to correct an incorrect request later.
Choose the Correct Purpose
Select the purpose that matches the financial transaction you’re completing. If you’re generating the mandate for a loan application, make sure the purpose corresponds to the request from the lender.
Enter the Maximum Amount
Enter the maximum amount requested by the institution or required for the transaction. Don’t enter a random amount just to complete the form. Check the amount with the institution before submitting.
Select the Correct Institution
Choose the correct bank, lender, insurance company, cooperative, or other institution shown in the portal. Pay attention to similarly named institutions so the mandate is connected to the correct organization.
Review Everything Before Submission
Before clicking Submit, check all the information again. A wrong institution, purpose, or amount can create problems when the institution tries to process the mandate. If you’re unsure about a field, confirm the information with the institution requesting the mandate.
What Happens After You Submit a Mandate?
Submitting the form starts the mandate process. The next step is to receive and keep the reference sent to your registered phone.
Mandate Number Sent by SMS
Current portal guidance states that the mandate number is sent by SMS to your registered mobile number after the request is submitted. If you don’t receive it, first check that your registered phone number is active and correctly linked to your account.
Keep the Number for Your Application
Don’t delete the SMS after receiving the mandate number. You may need to provide the number to the institution handling your loan or financial transaction. Keep it available until the application has been completed.
A Mandate Number Does Not Guarantee Loan Approval
Generating a mandate only provides the payroll authorization or reference required for the relevant transaction.
It does not guarantee that a bank or lender will approve your loan. The institution still checks its own requirements, affordability criteria, and application information.
GoG ePay Mandate Number Problems and Fixes
Sometimes the mandate process doesn’t work as expected. The problem may be related to your account, phone number, portal availability, or the information entered in the form.
Mandate Option Is Missing
If you don’t see the Mandate option after logging in, make sure you’re using the correct account and that your registration is complete.
If the option remains unavailable, contact your HR or use the support channels provided by CAGD rather than creating another account.
Mandate Number SMS Not Received
Check that the mobile number registered on your account is active and able to receive SMS messages.
Also give the system some time to process the request. If the SMS still doesn’t arrive, verify your account information and contact the relevant support channel.
Incorrect Employee or Ghana Card Details
If your employee or Ghana Card information doesn’t match your payroll record, you may have trouble accessing services.
CAGD’s 2026 registration process requires employee number and Ghana Card verification, so incorrect information should be resolved before continuing.
Mandate Submission Fails
Check every field before trying again. Pay attention to the purpose, maximum amount, and institution.
If the same error continues, avoid repeatedly submitting duplicate mandates. Contact your HR or CAGD support for assistance.
Portal Is Not Loading
A temporary connection or portal issue can prevent the page from opening.
Try refreshing the page, checking your internet connection, or using another browser. If the entire service is unavailable, wait and try again later rather than repeatedly submitting the same request.
How to Check Your Mandate Details
After generating a mandate, checking the information associated with it can help you confirm that the request was submitted correctly.
Find Your Submitted Mandate
Open the Mandate section after signing in and look for your submitted mandate records. The exact layout may change as the new portal is updated, so use the labels shown on your current dashboard.
Check the Institution and Amount
Confirm that the mandate is associated with the correct institution and that the amount matches your application. If you notice a problem, contact the institution or the appropriate support channel before using the mandate for a financial transaction.
Keep Your Mandate Reference Secure
Keep the mandate number as a financial transaction reference. Share it only with the institution that needs it for the specific application, and never give anyone your GoG ePay Services password or OTP.
Important Safety Tips for Your Mandate Number
Your mandate is connected to payroll-related financial activity, so take care when generating and sharing it.
Never Share Your Password or OTP
Never give your GoG ePay Services password or OTP to a loan officer, agent, friend, or another person.
You should generate the mandate yourself through your own account. Guidance on CAGD e-payslip transactions also warns employees against giving their Staff ID and password to loan or insurance officers.
Confirm the Institution Before Submitting
Check the institution name before creating the mandate. If you’re applying for a loan, compare the institution shown in the portal with the lender you’re actually dealing with.
Do Not Create Duplicate Mandates Without a Reason
Avoid generating multiple mandates for the same transaction unless the institution specifically tells you to do so. Duplicate requests can make it harder to determine which mandate should be used for your application.
FAQs
Conclusion
Generating a GoG mandate number in 2026 is handled through the new GoG ePay Services portal. The basic process is to log in, open Mandate, select Add New, enter the purpose, maximum amount, and institution, and submit the request.
After submission, keep the mandate number sent to your registered phone because your bank or financial institution may need it for the related application. Most importantly, review the details carefully and never share your GoG ePay Services password or OTP with another person. Once done, Check & Download Your ePayslip to confirm your payroll access is still active.